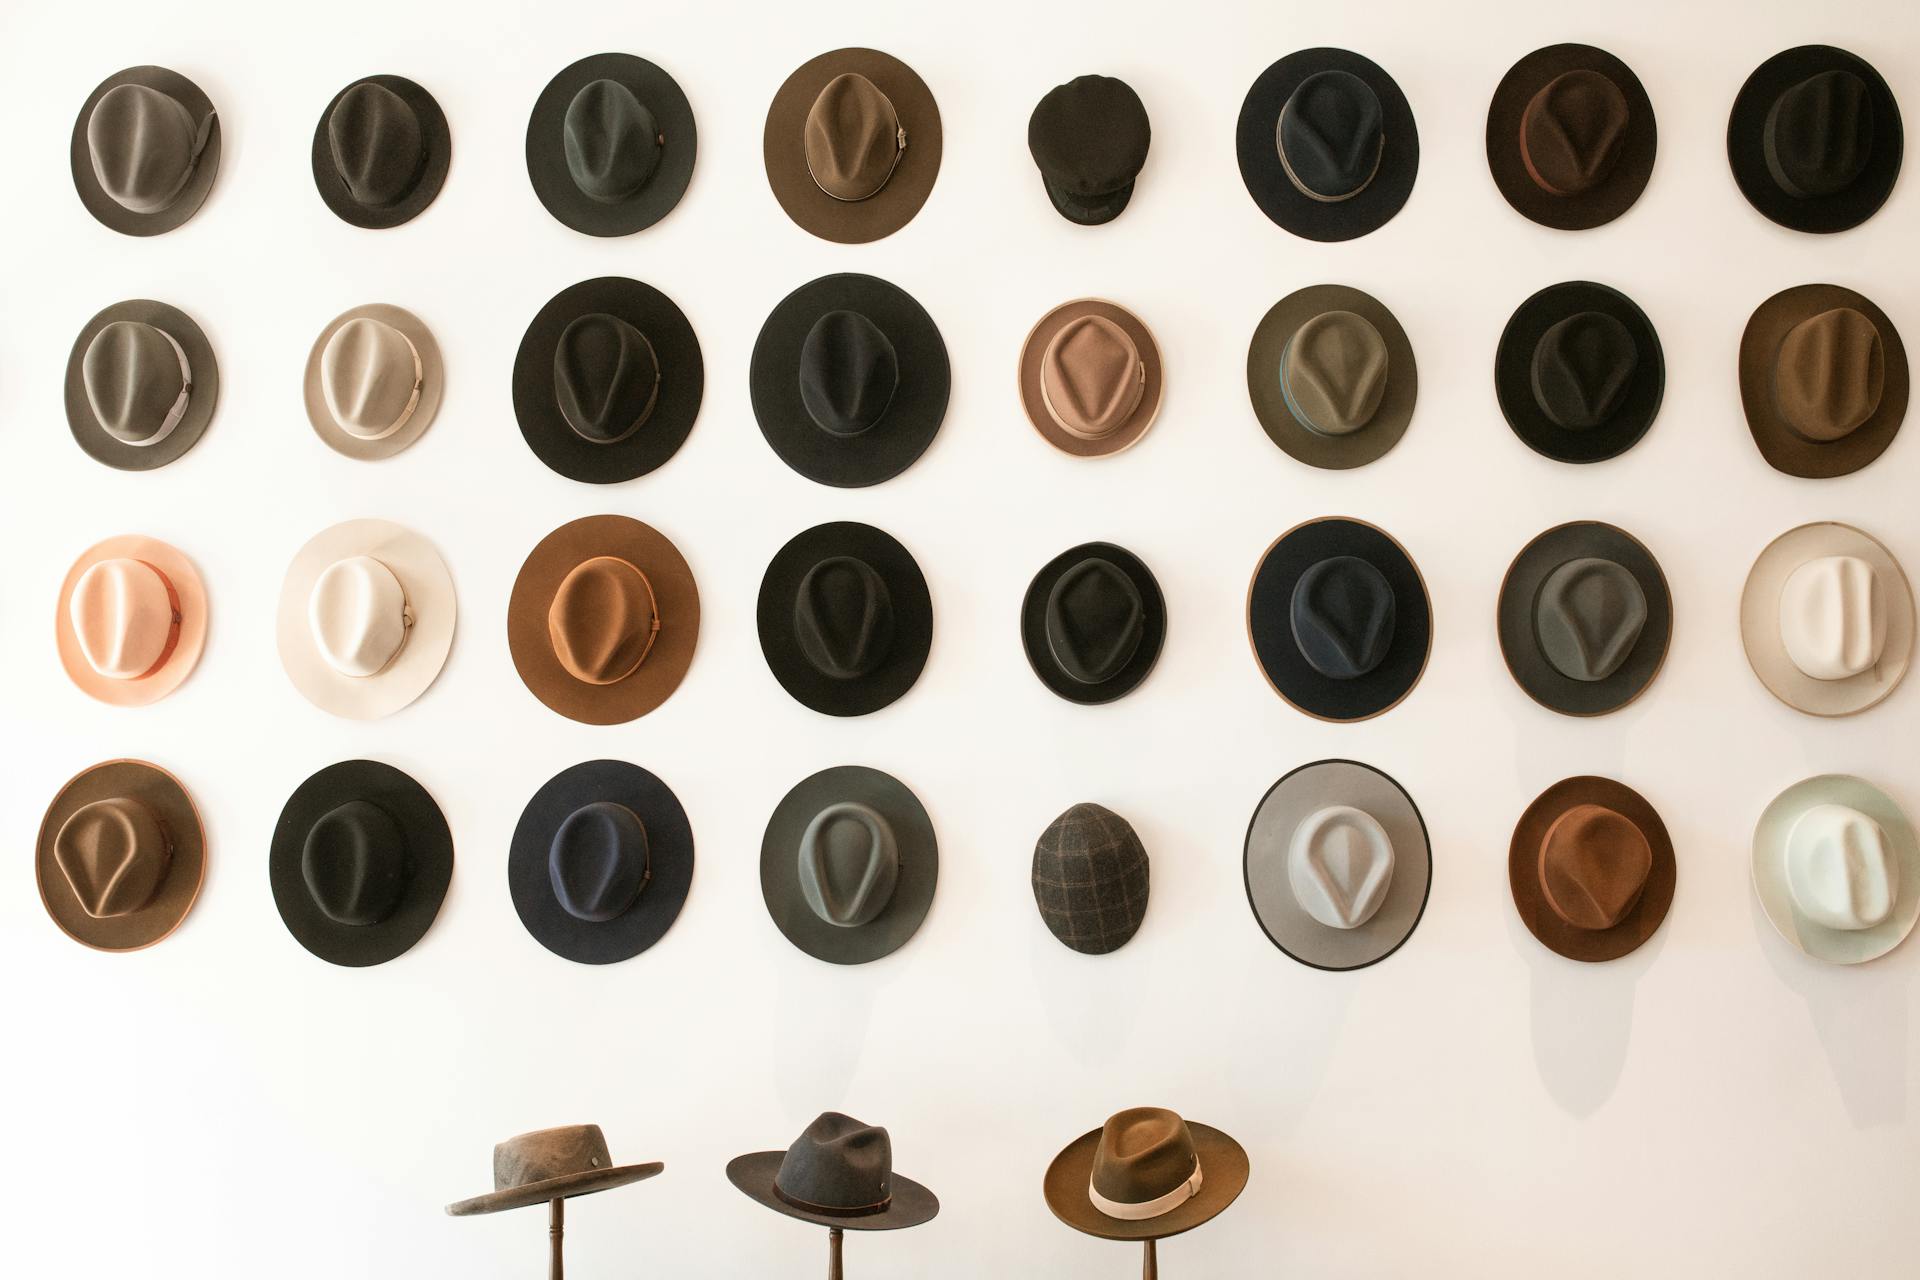
If you're looking for an alternative to the traditional method of hanging hats on wall with nails, then fear not! There are plenty of creative, no-nail solutions that are just as practical and stylish.
One great way to hang hats without using nails is with adhesive hangers. These simple hangers can be found at your local home improvement store and require zero tools or fasteners – just peel and stick! Place the hanger where you’d like your hat to hang, then hang the hat by a loop or band atop it. Depending on the size of your hat collection, you might choose single-hook or double-hook styles for more options.
Another great option for hanging hats without nails is ribbon loops. Cut pieces of decorative ribbon into strips about 6” long and knot each strip into loops at both ends. Securely tie each loop around either side of a board (in varying patterns!) so there’s something to place your hats over after tying knots around their brim bands or bill folds. Be sure to use enough ribbon loops so that all sizes can fit stably; get creative in how you arrange them for extra pizazz!
Last but not least: why not use magnets? Select decorative magnets from stores like Home Depot (or even fabric materials from craft stores) in shapes/patterns that align with any style and simply attach them in rows onto the walls where you intend on placing your hats; once they are securely adhered, they make sturdy placement surfaces while also doubling as décor accents between uses! Even better – add an extra layer by attaching fabric patches cut into meaningful shapes onto those same magnets before placing them onto the walls (applying one piece between two stacked magnets will create a sleeve pocket). Finish up by pressing pairs of garment snaps through each patch pocket so it fits snugly over each respective brim band when putting away hats; these snaps should hold firmly but still be easily pop out at any time when ready to switch things up again with different designs/colors down below.
No matter which zero-nail options work best for either spaces or budgets in question, it doesn't hurt to get creative when hanging those headpieces! With any luck – experimenting with new ways may actually present itself as another form challenge since there are plenty more material choices beyond simple screws & anchors… which also means potential new chances & opportunities every time picking out perfect stuff along this wonderful journey called life ;)
See what others are reading: How to Sew a Patch onto a Hat?
How can I hang posters and paintings on walls without nails?
Are you looking to give a room in your home a big makeover without leaving nail holes in the wall? If so, there are some clever and easy ways you can hang pictures and posters without using nails!
Using Poster Tape: Poster tape is specifically designed for hanging lightweight items on walls without using nails or sticky residue. It’s a low-cost solution that is great for temporary decorations like posters or artwork. Simply remove the protective backing from one side of the tape and press it onto the back of your poster or painting. Then press it firmly onto the wall where you want it to be located. The adhesive backing is strong enough to hold up even heavier items like canvas paintings and posters!
Command Strips: Like poster tape, Command strips help you hang art on walls with no nail damage. They’re made from velcro-like fabric that sticks directly to all types of surfaces, including wood, brick, plastic etc. These strips can support much heavier items than most adhesives and they won’t leave any residue when removed either. To use them properly all you have to do is peel off the adhesive backing then attach one side to your post or painting and then stick it up on your wall wherever desired!
Hooks & Adhesives: Another alternative way of hanging pictures without using nails is with hooks that provide suction power or have an extra-strong adhesive base underneath them. These hooks are designed specifically for hanging light objects such as frames, mirrors etc., without causing any damage to your walls since they don’t require screws or nails (super handy!). Just make sure that when selecting these types of hangers select ones which are secure enough for what you want to hang as lighter hooks may not support heavier objects well enough – better safe than sorry am I right?
No matter how creative we get with our decorating ideas - sometimes getting stuck with how best we can display our artwork means we turn towards something as simple as taking out a hammer but thankfully there are plenty alternatives out there now should this route not be suitable - so no more hammering away at our poor walls!
Worth a look: Hang Mirror
What is the best way to display hats on a wall without using nails?
One of the best ways to display hats on a wall without using nails is with a hat rack. Hat racks provide an effective and elegant way to organize and display your collection of caps, fedoras and other headwear without damaging your walls. They come in a variety of designs, so you can choose one that best fits the décor of your home or business. With different materials like wood and metal available, it’s easy to find a hat rack that allows you maximum flexibility when setting up the perfect display.
Another simple but effective solution to displaying hats on wall is adhesive hooks. These ingenious little hooks are designed to stick onto any flat-smooth surface, meaning they can hang hats securely where you need them most! Many adhesive solutions use either 3M CommandTM strips or suction cups depending on what works best for your particular set-up needs; all that’s required are some lightweight items (like hats) being attached with light pressure - so no tools or tools needed! This also keeps them removable for easy relocation in case you decide on another set up down the road - a great option for renters who might not be able (or willing!) to put holes in their walls!
Overall, there are several creative solutions if you’re looking for an efficient way to store and organize headwear without resorting to nails or holes in drywall; by finding out what works best according to both your design style and amount of space available, it's possible create an aesthetically pleasing setup wherever you happen live - no hammer required!
Readers also liked: Organize Baseball Hats
What are some other ways to hang a hat on a wall without nails?
If you’re looking for a way to hang up your favorite hat without using nails, there are plenty of creative alternatives worth exploring. Here are just a few ideas for how to hang up a hat without using any nails or screws in the wall.
One popular idea is to use adhesive hooks. These come in all sorts of shapes and sizes, and they can hold up surprisingly well. If you don’t want too many things hanging from your walls, this can be a good option since these hooks won’t damage the wall or add much bulk or weight. Just make sure you choose one that is strong and sturdy enough to hold the weight of your hat!
Another method is to get creative with yarn or rope! You could easily create an net-like shape by tying several pieces together and hanging it up on the wall. You can then use this net structure as your hanging rod for hats - just make sure that it's secure so that there's no chance of slipping off!
Finally, if you have closet rods in your home already, consider finding some unique hardware that will enable you to hang things from them. This setup doesn't require any nailing into the walls at all; rather, it utilizes existing vertical space in an efficient way without compromising the design aesthetic of your home too much.
All in all, there are lots of ways to hang hats without needing any nails! Whether it be through adhesive hooks, yarn/rope structures, or utilizing existing closet rods - any one of these methods makes for an easy and clever setup when it comes time for decorating (or merely storing) hats around your living space!
If this caught your attention, see: How to Clip Cat's Nails When They Hate It?
How do you attach a hat rack to a wall without using nails?
One of the great things about hat racks is that they’re versatile enough to be mounted in a variety of different ways. Nails may be the most popular and obvious choice, but why not get creative? Here are some ways you can attach a hat rack to a wall without using nails.
Command Strips: Command Strips are an adhesive that can hold many items with ease and leave no damage to your wall surface when removed. The strips come in various sizes, so make sure to choose one that fits with the size and weight of your hat rack. To start, simply remove the adhesive tape from each end of the strip and affix it onto the back side of your rack. Afterwards, press firmly onto your wall for at least 30 seconds until it sticks securely into place!
Screws & Anchors: If you happen to have screws on hand along with accompanying wall anchors, then this is an ideal solution for attaching a lighter-weighted hat rack firmly against any flat surface wall. Before drilling any hole into walls however, be sure to measure twice as doing so incorrectly could cause any slight miscalculation due to damages that’ll cost more headaches down the road! After having both items prepped up front (screws & anchors), use screw anchor in spots where desired before screwing in screws at ideal intervals until tight fit has been achieved—all while being careful not overextend beyond recommended threshold measurements marked on packaging instructions (as these aren’t designed for heavy-duty applications). Finally, drill mounting holes for each loop through tailgate itself—looping them around screws tightened afterwards as way securing entire unit together permanently!
Heavy Duty Adhesives: If command strips or screw + anchors don’t seem like sound solutions due to weight considerations or other factors playing parts; then industrial adhesives designed explicitly powerful wallpaper / surfaces such as strong double sided tapes are always viable options worth considering too! This type adhesives won't damage paint jobs nor peel away layers during removal process if ever wish appease those sensibilities down road ;) And hey~ since no drilling involved whatsoever– bonus bonus :)
No matter which installation mthod(s) chosen– ultimately one thing mentioned time again when comes attaching accessories / fixtures walls—measure twice!! Doing will greatly reduce risk unnecessary afterwards & associated liabilities together accompany said decision(s).
See what others are reading: Can T Tie the Knot without You?
What type of adhesive can I use to hang a hat on a wall without nails?
Finding the right adhesive to hang a hat on a wall without nails can be tricky. After all, you want something that's going to hold up without damaging the surface of your wall or the hat itself. But with the right adhesive in hand, you can safely and easily display your favorite hats without resorting to nails, screws or other hardware.
One type of adhesive that is commonly used for this task is a heavy-duty mounting tape such as 3M Command Strip – Clear Refill Strips or Hold It Mate Adhesive Strips. These mounting strips are designed specifically for hanging heavier items, like framed pictures and even small shelves, but they are also perfect for hanging lighter items like hats on walls without nails.
When applying these strips make sure to clean both surfaces with a damp cloth before attaching them so that evenly distributed pressure will hold it securely in place. Make sure not to leave any air pockets trapped behind which could create an uneven holding surface causing large amounts of pressure when weight is added resulting in decreased holding power overall over time as well as possible damage from too much force suddenly released onto one small area.
For heavier items such as shelves or baskets an additional strip may be needed for support by placing two extra strips square around each corner at 180° angles forming an X pattern with four total strips rather than three per usual instructions when using 3M Command strip products described on their package instructions (which may vary depending upon product).
For difficult surfaces there are special adhesives available such as GE Silicone 2 Kitchen & Bath Caulk which is easier applied where caulk and sealant combinations offer superior long-term hold while providing flexibility within temperature changes due to its silicone formulation base material making it ideal when temperatures change quickly and unexpectedly within indoor environments such as basements apartments etc.. This holds true especially if outdoor temperatures could fluctuate causing additional tensions on bonding materials inadvertently over extended periods of time beyond usual expectations not typical under normal circumstances (i..e heat fluctuations caused by seasonal changes outside indoors making adhesion strength weaker becoming unstable). Some other types of adhesives suitable for hanging lightweight items include removable hook loops (such as Velcro brand) from many major retailers allowing indirect crafting applications; foam tapes ideal when temperatures start shifting dramatically outdoors inside due having some flexibilities absorbs shock/ vibration associated from natural disasters earthquakes storms storms etc along with permanent non-drying glue based products like DOPAS N300 Glue Stick specifically created bond light objects together but unlikely good quite strong enough depend solely only item itself weighing enough or thick strong material fibers textiles needing support added just underneath corresponding length required true size shape spread out weight equally equally distributedly felt pressed firmly against wall while still able utilizing excess empty space along upper edges edges edge side opening extend further outward if desired add little bit extra confidence factor overall alignment securing safety stability longevity both wall/ object selected properly planed ahead time far prior pressing purchase decision being made...etc ;)
Overall every household should have list resources home improvements keeping handy just case scenario situation scenario arises requiring iissue fixed developed creative solution spending either money adding additional exterior objects fixtures amenities inside soon promise return examples installations specialties repairs remodel renovations decorations pieces art antique furniture patio equipment tools lawn garden supplies various materials electronics appliances vehicle components parts....etc ;)
Is it possible to hang hats on a wall without using screws or nails?
Hanging hats on the wall without using screws or nails is completely possible and doesn't have to be complicated. All you need is a little ingenuity and repurposing of various supplies around the house! Here are just a few ways you can achieve this task:
1. Put up Hook & Loop Tape: You can purchase hook and loop tape (or Velcro) from your local hardware store or online, then attach it to your wall in any shape or form desired. From here, you can simply attach any type of hat to it with ease! This option is great if you want versatility in where and how many hats you'd like to display.
2. Hang Hats with Ribbon: Another easy way to hang hats without using screws or nails is by using ribbon. Simply cut ribbons into strips long enough for each hat, tie them onto hooks on the wall (using tape if necessary), then attach your hats onto the ribbons!
3. Use Adhesive Strips: Adhesive strips like 3M Command Strips make hanging items incredibly simple without causing damage - perfect for those wanting quality plus convenience when putting up their hats! They come in several different sizes as well, so that regardless of your specific needs, odds are there's an adhesive strip size good for it
Whatever method you decide on, hanging hats on the wall without needing screws or nails is achievable with some creative thought and elbow grease!
Featured Images: pexels.com